A durable, attractive garage floor begins long before the coating is applied. While epoxy and other concrete floor coatings can transform the appearance of a garage, their performance depends heavily on the condition of the concrete underneath. Dirt, grease, moisture, and weak concrete can interfere with adhesion and lead to peeling, bubbling, or premature coating failure. Professional installers follow a systematic preparation process to create a clean, stable, and properly profiled surface. From inspecting the existing concrete to repairing cracks and checking moisture levels, every step helps establish a strong foundation for the new flooring system. In this guide, we explain how professionals prepare a garage floor installation and why proper preparation matters for long-term results.
Why Is Garage Floor Preparation Important?
Concrete may look smooth and solid, but its surface can contain hidden contaminants, small cracks, old coatings, and moisture. Applying a new coating without addressing these issues can prevent it from bonding correctly with the concrete.
Professional preparation helps to:
- Improve the bond between the concrete and the coating.
- Remove oil, grease, dust, and other contaminants.
- Identify and repair cracks, chips, and damaged areas.
- Reduce the risk of peeling, flaking, and bubbling.
- Create a consistent surface for an even finish.
- Improve the durability and appearance of the completed floor.
Proper preparation is especially important for garages that experience vehicle traffic, temperature changes, road salt, and regular exposure to chemicals or automotive fluids.
1. Inspect the Existing Concrete Surface
The first step is a detailed inspection of the garage floor. Professionals evaluate the concrete to understand its condition and determine which preparation methods are necessary. During this assessment, installers look for visible cracks, surface scaling, uneven sections, oil stains, old paint, previous coatings, and signs of moisture damage. They may also examine areas where the concrete sounds hollow or appears weak.
The condition of the existing floor influences the installation plan. A relatively sound concrete slab may require less repair work than an older garage floor with extensive damage or several layers of previous coating. This initial inspection helps installers select suitable repair materials, surface preparation equipment, and a coating system that matches the condition of the concrete.
2. Remove Dirt, Oil, Grease, and Other Contaminants
A garage floor can collect years of automotive fluids, tire residue, dust, dirt, and cleaning product buildup. These contaminants can create a barrier between the concrete and the new coating. Professionals remove loose debris and thoroughly clean the surface before moving to the next stage. Depending on the type and severity of contamination, they may use suitable degreasers, mechanical cleaning methods, or other specialized treatments. Oil stains require particular attention because oil can penetrate porous concrete. Simply wiping the surface may not remove contamination that has moved deeper into the slab. After cleaning, the floor must be prepared according to the coating manufacturer’s requirements. Some cleaning methods also require rinsing and sufficient drying time.
Why this step matters: Even a high-quality floor coating can fail if contaminants prevent it from bonding directly to sound concrete.
3. Repair Cracks, Chips, and Damaged Areas
Once the floor is clean, installers address visible defects in the concrete. Cracks, pits, chipped edges, and deteriorating sections can affect the final appearance and may create weak points beneath the coating.
The repair process depends on the type of damage.
- Hairline and larger cracks: Professionals assess the crack and use a compatible repair material where appropriate.
- Pitting and small holes: Damaged areas may be filled with a suitable concrete repair compound.
- Spalled concrete: Loose or weakened material is removed before the affected area is rebuilt.
- Uneven patches: Grinding or other approved leveling methods may be used to improve surface consistency.
Not every crack can be treated in the same way. Cracks caused by ongoing movement may require additional assessment before repair. Filling a moving crack without addressing its cause can result in the crack reappearing through the finished coating. Allowing repair materials to cure according to the manufacturer’s instructions is essential before the installation proceeds.
4. Grind the Concrete to Create the Right Surface Profile
Mechanical grinding is one of the most important stages of professional garage floor preparation. Concrete that appears smooth may not provide the surface texture needed for a reliable coating bond. Installers commonly use professional concrete grinders fitted with suitable diamond tooling to remove weak surface material, residual coatings, and minor imperfections. Grinding also creates a consistent surface profile that helps the coating adhere to the concrete. The appropriate level of grinding depends on the existing slab and the coating system being installed. Some systems require a more pronounced profile than others. Professionals pay attention to corners, edges, and areas around walls where large equipment may not reach easily. These sections are prepared using appropriate smaller tools. Grinding should be followed by thorough dust removal. Industrial dust extraction equipment helps collect fine concrete particles that could otherwise interfere with coating adhesion.
5. Check Moisture Conditions Before Installation
Moisture is a critical consideration when preparing a garage floor. Concrete can contain moisture within the slab or allow moisture vapor to move upward from the ground. If moisture conditions exceed the coating system’s limits, the finished surface may develop bubbles, blistering, discoloration, or adhesion problems. Professionals assess moisture using suitable testing methods and compare the results with the coating manufacturer’s requirements. Depending on the project, testing may involve in-situ relative humidity probes or other recognized methods. Temperature and humidity conditions are also considered because they can influence curing and installation performance. If moisture levels are unsuitable, the installer may need to investigate the source, allow additional drying time, or recommend a compatible moisture-mitigation system. Applying a coating over a damp floor without understanding the moisture conditions can create avoidable problems later.
6. Prepare the Floor Edges and Hard-to-Reach Areas
The main garage floor is only part of the preparation process. Edges, corners, expansion joints, and areas around posts or thresholds also require attention. Professionals use suitable tools to prepare these locations so the coating can bond consistently across the intended application area. They also identify joints that need special treatment. Expansion and movement joints are not always filled like ordinary cracks because they may need to continue accommodating movement. The correct approach depends on the joint’s purpose and the selected flooring system. Careful edge preparation helps create a more uniform finish and reduces the likelihood of missed areas during coating application.
7. Remove Dust and Perform a Final Surface Check
After grinding and repairs are complete, installers thoroughly remove the remaining dust and debris. This may involve industrial vacuuming and other cleaning methods appropriate for the selected coating. The floor is then inspected again to confirm that the preparation work has achieved the required result.
Professionals typically check for:
- Remaining dust or loose concrete particles.
- Unrepaired cracks, pits, or weak areas.
- Residual oil, grease, or old coating.
- Inconsistent surface texture.
- Moisture conditions that could affect installation.
If any issues remain, they should be corrected before the coating is applied. Skipping this final inspection can compromise work that has already been completed correctly.
8. Confirm Installation Conditions and Apply the Coating
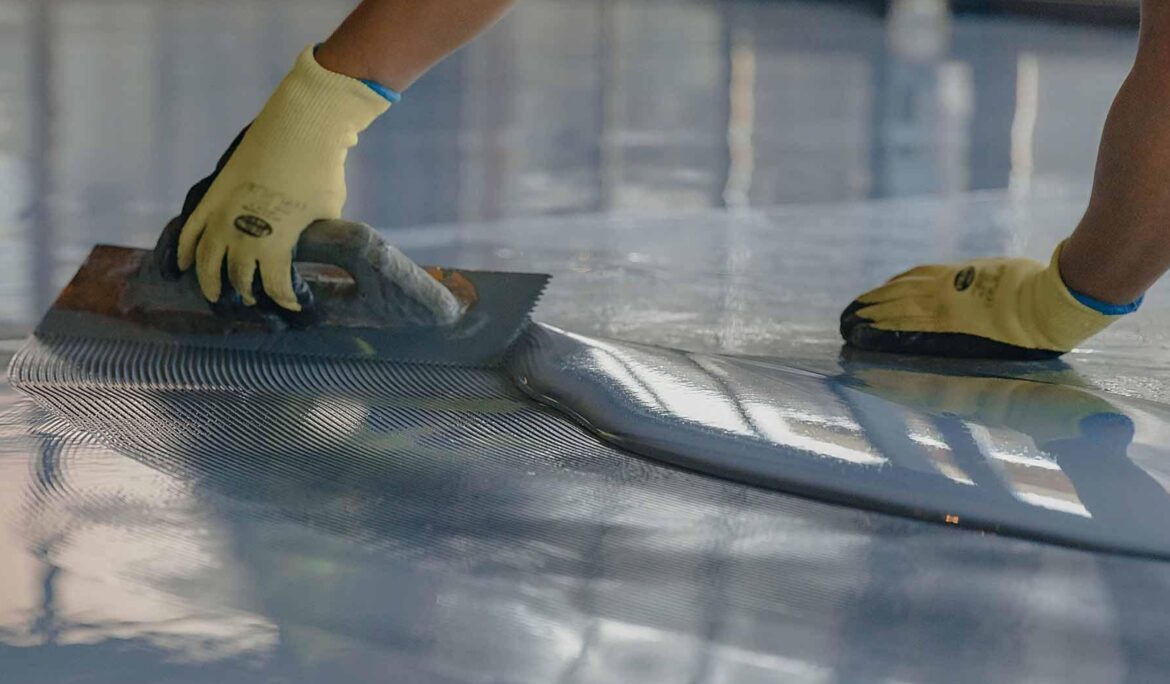
Once the surface is ready, the installer checks that the environmental and substrate conditions meet the product specifications. These requirements may include concrete temperature, ambient temperature, humidity, and moisture limits. The coating components are then mixed in the correct proportions and applied within the specified working time. Depending on the chosen system, installation may include a primer, a base coat, decorative flakes, and a protective topcoat. Each layer must be applied according to the manufacturer’s instructions, including any required recoat intervals. The completed floor also needs adequate curing time before vehicles, heavy equipment, or regular foot traffic are introduced. Although coating application is the visible part of the project, it depends on the quality of every preparation step that comes before it.
Professional Garage Floor Preparation: A Quick Overview
| Preparation stage | What professionals do | Why it matters |
| Initial inspection | Evaluate concrete condition and existing damage | Identifies potential problems before installation |
| Surface cleaning | Remove dirt, oil, grease, and debris | Reduces contamination that can interfere with adhesion |
| Concrete repairs | Address cracks, pits, and damaged sections | Creates a more stable and consistent surface |
| Mechanical grinding | Remove weak material and create the required profile | Helps the coating bond to the concrete |
| Moisture testing | Evaluate moisture conditions against product limits | Helps prevent moisture-related coating failures |
| Edge preparation | Prepare corners, joints, and perimeter areas | Supports consistent coverage throughout the floor |
| Final inspection | Check cleanliness, repairs, and surface readiness | Confirms the floor is ready for coating |
| Coating installation | Apply the selected system under suitable conditions | Produces the intended finish and protective layer |
Can Homeowners Prepare a Garage Floor Themselves?
Homeowners can handle basic tasks such as removing stored items, sweeping loose dirt, and identifying visible damage. However, professional preparation often requires specialized grinding equipment, appropriate dust extraction, concrete repair expertise, and reliable moisture testing. Using acid etching or household cleaning products as a substitute for a complete preparation process may not deliver the surface profile or cleanliness required by a particular coating system. Improper grinding can also damage the concrete or leave an inconsistent profile. For homeowners considering a DIY project, it is important to follow the flooring manufacturer’s preparation instructions carefully. Where the concrete has extensive damage, persistent oil contamination, moisture concerns, or an existing coating, a professional assessment can help avoid costly mistakes.
What Happens When Garage Floor Preparation Is Skipped?
Inadequate preparation can create problems even when the coating itself is high quality. Common issues include peeling around vehicle parking areas, bubbling caused by moisture, flaking over weak concrete, and uneven finishes caused by an inconsistent surface. Repairs may require removing failed coating, correcting the underlying problem, and preparing the floor again before reapplication. This can increase project costs and extend the time the garage remains unusable. Investing in proper preparation from the beginning helps reduce these risks and gives the flooring system a better opportunity to perform as intended.
Choosing a Professional Garage Floor Coating Installer
When comparing garage floor coating contractors, homeowners should ask about the preparation process rather than focusing only on the coating brand or final appearance. A reliable installer should be able to explain how the concrete will be cleaned, mechanically prepared, repaired, and checked for moisture. They should also describe the coating system being used, the expected curing time, and the maintenance requirements after installation. Look for a contractor who evaluates the actual condition of the garage floor instead of promising the same solution for every concrete surface. A preparation plan tailored to the slab is an important part of achieving a durable result.
Closing Insights
Preparing a garage floor for installation involves more than sweeping away dirt and applying a fresh coating. Professionals inspect the concrete, remove contaminants, repair damaged areas, grind the surface, evaluate moisture, and check the floor before applying the coating. Each step helps improve adhesion, appearance, and long-term durability. Experienced concrete coating contractors like NLKD Concrete Coatings understand the importance of proper surface preparation in achieving a lasting finish. Following the right preparation methods and coating manufacturer’s requirements helps homeowners get a garage floor that looks great and withstands everyday use.
Frequently Asked Questions About Garage Floor Preparation and Installation
Professionals inspect the concrete, remove dirt and old coatings, repair cracks, grind the surface, and check moisture levels before applying the new coating.
Proper preparation helps the coating bond with the concrete, reduces the risk of peeling, and supports a durable, even finish.
Concrete grinding removes weak surface material and creates the profile needed for coating adhesion. The exact method depends on the coating system.
Preparation may take several hours or longer, depending on the garage size, concrete condition, existing coatings, and repair requirements.
Yes, suitable cracks, chips, and small holes are usually repaired before coating. Structural damage or moving cracks may require further assessment.
It depends on the condition and compatibility of the existing coating. Loose, peeling, or incompatible materials generally need to be removed first.
Contractors use suitable degreasers and cleaning methods to remove oil and grease. Deeply absorbed oil may require additional treatment.
Moisture testing helps determine whether the concrete meets the coating manufacturer’s requirements and reduces the risk of moisture-related coating failure.
Professionals may use concrete grinders, industrial vacuums, crack repair tools, cleaning equipment, and moisture-testing instruments.
Minor surface imperfections may be corrected through grinding or patching. Significant unevenness or settlement may require additional repairs.
The concrete should be free from dust, grease, loose material, and other contaminants that could interfere with adhesion.
Poor preparation can cause peeling, bubbling, uneven coverage, weak adhesion, and premature coating failure.
Epoxy and polyaspartic systems are popular options. The best choice depends on the concrete condition, expected traffic, appearance, and maintenance needs.
Many coating systems require approximately 48–72 hours before vehicle traffic, although the exact time depends on the product and curing conditions.
Concrete grinding can produce dust, but professionals often use dust-controlled grinding equipment connected to industrial vacuum systems.
Yes, many damaged floors can be coated after appropriate repairs. Severe structural damage or persistent moisture problems may require additional work.
Remove vehicles, stored items, and loose belongings from the garage. Your contractor may also provide specific cleaning and access instructions before installation.
Many residential garage floors can be completed in one to three days, depending on the size, preparation requirements, coating system, and curing time.
Costs depend on the garage size, concrete condition, repair work, surface preparation, and selected coating system. An on-site assessment helps determine the price.
Choose contractors with relevant experience, a clear preparation process, suitable coating options, detailed estimates, and instructions for curing and maintenance.